Article
8 comments

Baking in Translation: NZ Ingredients for US Recipes

Two weeks ago, I started a riot on my personal Facebook page with this photo:

Boston_cream_piesThat’s two homemade Boston cream pies. Vanilla cakes filled with vanilla-bean pastry cream and topped with a dark chocolate glaze. They look delicious, but there was a problem: when I used the US recipe for the cakes with New Zealand ingredients, the cakes didn’t come out light and fluffy, as they are supposed to be. Instead, they were almost as heavy as pound cake, squeezing out the vanilla-bean custard when the cake was sliced and served. This varied outcome is a good example of what can happen when you try to bake US recipes with New Zealand ingredients.

So, this post is here to help you adjust US baking recipes for the NZ kitchen. And it focuses on baking from scratch. This isn’t just a baking challenge for Yankee expatriates in New Zealand. If you are entranced by images on a popular culinary blog overseas, you might try to recreate the recipe…and run into some problems, or find that the result doesn’t have exactly the taste or texture you expected. This post is here to help.

As I learned when I tried to find a Boston cream pie recipe, many US baking recipes now rely to an alarming degree upon mixes and packaged items. If you want that artificial baking-mix flavor, it’s waiting for you in the baking aisle of a large NZ grocery store. But that’s not going to help you make challah bread, St. Louis butter cake, flaky pie crust, or…the list goes on.[Read more]

Article
0 comment

Travel: A New England Interlude

Where have I been? First I was getting ready for a trip to the USA, and then…I was on the trip. Now that I’m at the midpoint I have time to share some of my adventures with you.

First, I spent close to two weeks in New Haven, Connecticut, for my mother’s 70th birthday, related festivities, and general catching up. I also had the great pleasure of seeing my Internet pen pal Michelle and her husband Mark, and with a friend of mine who teaches historical dance and is the mastermind behind the blog Rixosous. Most of all, seeing my mom doing well, catching up with her, reconnecting…oh, man. All the Feels. All of them.

CT-NewHavenThe mean streets of New Haven, Connecticut.

CT-YaleMuseumIn the Yale Museum of Art. Yale’s two art museums are free.

CT-MarshyBackyardSpring woodlands.

CT-BirthdayCake-sm

I made my mom’s 70th birthday cake for her birthday crowd: orange buttercream and vanilla wine cake (recipe for the cake layer is here).

CT-ChicksKicking it old school at Chick’s, a vintage seafood drive-in by the shoreline. This was where we went after the beach when we were young….Revisiting it, it looks grim and utilitarian, but the food still can’t be beat.

Article
0 comment

Tiramisu, To Scale

This tiramisu image by Shok is pretty much what mine looks like. Image reused under Creative Commons with thanks
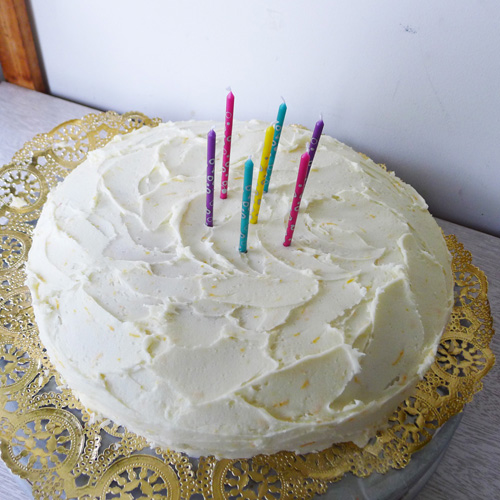
A friend of mine had her New Zealand citizenship party the other night. I plonked a tiramisu on the dessert table between the New Zealand flag sponge cake and the pavlova. It was the perfect creamy transition between the two. I’ve been asked for the recipe, so here it is!

Sometimes I want to make tiramisu for a small, intimate dinner party. And sometimes I want a bathtub-sized tiramisu to take along to a 50-person bring-a-plate. I get tired of scouting around for the right sized tiramisu recipe, so here is one recipe to fulfill all your tiramisu needs.

Creamy and oozy, utterly natural, if you want this to behave when served, prepare it in individual serving ramekins/cups/bowls. If you want a tiramisu cake, which is guaranteed to “plate up” neatly, here’s a grand recipe anointed by many a food blogger.

The Small one is for 2 to 6 servings, and it can be split between cups or ramekins for that number – it’s a bit richer than the two larger versions. The Medium is a good one for a larger party, 6 to 10 servings. And the Giant, perfect for a 9″ x 13″ tray, is for when you want to feed the world 18+ servings.

Ingredients Small / In Individual Cups / 2 to 6 Servings
Medium / Loaf Pan / 6 to 10 Servings Giant / 9″ x 13″ Tray / 18+ Servings
Mascarpone 200 gm 500 gm 1000 gm
Ladyfingers/savoiardi biscuits Half a regular packet One regular packet Two regular packets, one food service packet
Eggs 1 yolk 2 yolks 4 yolks
Confectioners sugar 2 tablespoons 3 tablespoons 6 tablespoons
Vanilla extract or paste ½  teaspoon 1 teaspoon 2 teaspoons
Rum 1 tablespoon 2 tablespoons 4 tablespoons
Espresso 2 tablespoons 3 tablespoons 6 – 7 tablespoons
Cocoa powder 1 tablespoon 2 – 4 tablespoons 4 – 5 tablespoons
Whipped cream 75 ml cream, whipped with 1 tablespoon confectioner’s sugar 150 ml cream, whipped with 2 tablespoons confectioner’s sugar 300 ml cream, whipped with 4 tablespoons confectioner’s sugar
  1. Tiramisu by FrancescaV, reused under Creative Commons, see link below.Whisk the egg yolks with the sugar until pale and frothy. Use an electric mixer/beater for best results.
  2. Add 2/3 of the rum, the confectioner’s sugar, the vanilla, and the mascarpone. Whisk until blended.
  3. Assemble the base layer of the tiramisu using the lady fingers. Put the coffee and the rest of the rum into a flat bowl. Dip a ladyfinger in the coffee/rum briefly on each side, then place it in the base of your dish. If using a ramekin/teacup/etc., break ladyfingers to size, then dip and place. Repeat until the base is covered in one layer.
  4. Pour enough mascarpone mix over the ladyfinger layer to cover. Sprinkle cocoa powder generously over the layer.
  5. Repeat this until your dish has layers. A loaf pan takes 2 to 3 layers, the 9 x 13 pan recipe takes 2 layers.
  6. Refrigerate overnight, covered.
  7. Cover with whipped cream before serving and sprinkle with a final dusting of cocoa powder.

Sugar Note: You can substitute caster sugar for confectioner’s sugar. Confectioner’s will give a better result, but it contains corn starch, which some people are allergic to.

Food Safety Note: If this is being served on a buffet or for a “bring a plate”, keep it cold and bring it out at dessert time. It contains raw egg yolks. Making the Giant one in a heavy glass or ceramic pan keeps it colder for longer on your table.

Mix it up with: Cinnamon, berries, cherries, chocolate shavings, more booze but not too much more.

In-process image courtesy of Francesca V – her very similar tiramisu recipe is here, in Italian. She wrote a book on tiramisu!
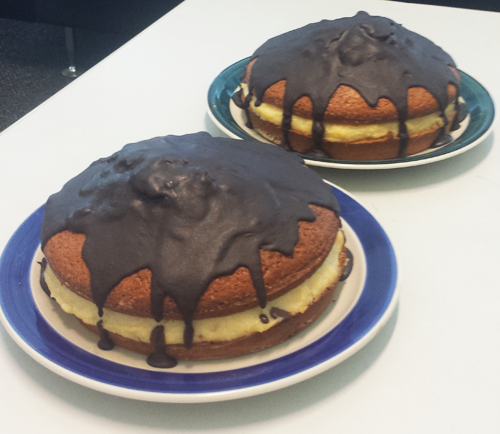
Article
1 comment

Two Tasty Things: Burlesque Rocks and Cherry Bomb Brownies

This Friday, I’m emceeing the Burlesque Rocks show in Wellington!

Combining sexy burlesque with pulse-pounding rock music for a fresh show, the line up is fantastic:  Fanciforia Foxglove, Winnie Chester, The Deity Dollicious, Sarah Marie Summer, Volumptous Twinkle, Miss Kimberly Grace, and, all the way from Colorado in the USA, Vivienne VaVoom. Tickets available here!

Last night, I went to the delightful thirteenth birthday of Tuesday Night Dinner in Wellington. My contribution was brownies with a cream-cheese-and-cherry swirl baked into them.  “Do you have the recipe?” Why, yes, and here it is, entirely from scratch so you can make it anywhere in the world. Cherry Bomb brownies, behind the cut. [Read more]

She came out well, didn't she?
Article
2 comments

Some Cupcakes, or, Drawing On Fondant

“Who Will Be The Cupcake Queen of Wellington?” I’ll give you a hint: at the A La Mode Photography Studio’s Revamp party, it wasn’t me. I was pipped to the post by winner Hester’s delectable marshmallow frosting. But my entry raised some eyebrows with an important question: is that actually edible?

Turns out that you can now get food coloring pens, edible markers, with which you can draw on fondant. So, for a cupcake competition hosted by a photography studio, I thought I’d do some pin-up-photo themed cupcakes, pushing a pink and black food coloring pen to the limit on white fondant rectangles.

The full set of pin-up cupcakes.

The white fondant “toppers” are perched on top of chocolate-and-rosewater cupcakes with rich swirls of chocolate-and-rosewater frosting. A little pink edible glitter is on them too, and they were served on a tray made of a frame filled with pink pinup photos from history.

You can draw on fondant as well as you can draw in real life. Just three caveats. First, there are no do-overs – what you ink is what you get. Second, the more dry/hard the fondant is, the better. And third, nobody will eat your little fondant pictures, even if you eat part of one in front of them to prove they are indeed edible.

She came out well, didn't she?

There is a fondant Uncanny Valley. A small fondant item, like a heart or rose, gets eaten, even if it’s fluorescent orange. Large fondant ornaments or wrappers are frankly removed and discarded. But a medium-sized fondant topper is a bit too much fondant to eat but manageable enough that people feel weird about throwing it away. Perhaps if I had used more food-like colors, such as brown ink on cream fondant, these cupcake toppers would have seemed tastier.

One of the young girls present took a fancy to this one.

When I left the cupcake contest, children were using the fondant pictures as trading cards.

Ain't she sweet? She's made of pure sugar!

Article
0 comment

Have Some Cake

Very busy over here doing some freelance work, wrapping up a project for a cartooning /illustration class, and getting ready for a July burlesqueathon (more news soon). This would explain why I saved three draft posts as “Published” instead of  “Draft.” If you were wondering why my ruminations were so unpolished, that’s why.  So, as a filler post while I perish of mortification, have some cakes that I made. I also recommend reading The Hectic Eclectic by the delightful Mrs. C – she’s boosted her posting about crafts and cuisine lately and is working on a frock coat.

Cakes! I baked this one for a burlesque travel fundraiser. Was she inspired by Arthur de Pin’s Peches Mignons characters? Mais oui! (Link here, NSFW). I didn’t make it to the fundraiser myself, being hammered by the flu, but I am told she was delicious. Red velvet cake and vanilla buttercream inside.

Burlesque damsel cake. Red velvet inside!

The other cake was my birthday cake this year, for my steampunk-retro-burlesque-dinosaur birthday party. Orange cake and chocolate frosting underneath the chocolate fondant.

As you can see, I come from the Ed Emberly school of fondant use. Each of these needed a custom-made cardboard mat which is simply heavy cardboard from a clean, food-grade box, cut to size and wrapped in shiny baker’s paper. The baker’s paper allows you to wipe off frosting mistakes easily.

Saurian and pinup girl cake!